Taktplace
r/place on a large LED display
Image shown on the display

Time-lapses generated by server from recent conferences where we presented this project

Write-up by trimen
HW:
Recently I found that you can buy 64x64 HUB75 LED panels for <15€, available with various pixel pitches from 2-6mm.
To drive the display I used an ESP32S3 DK with a simple adapter board that plugs directly into the connector on the back of the panel. The MCU is powered from an unused power connector.
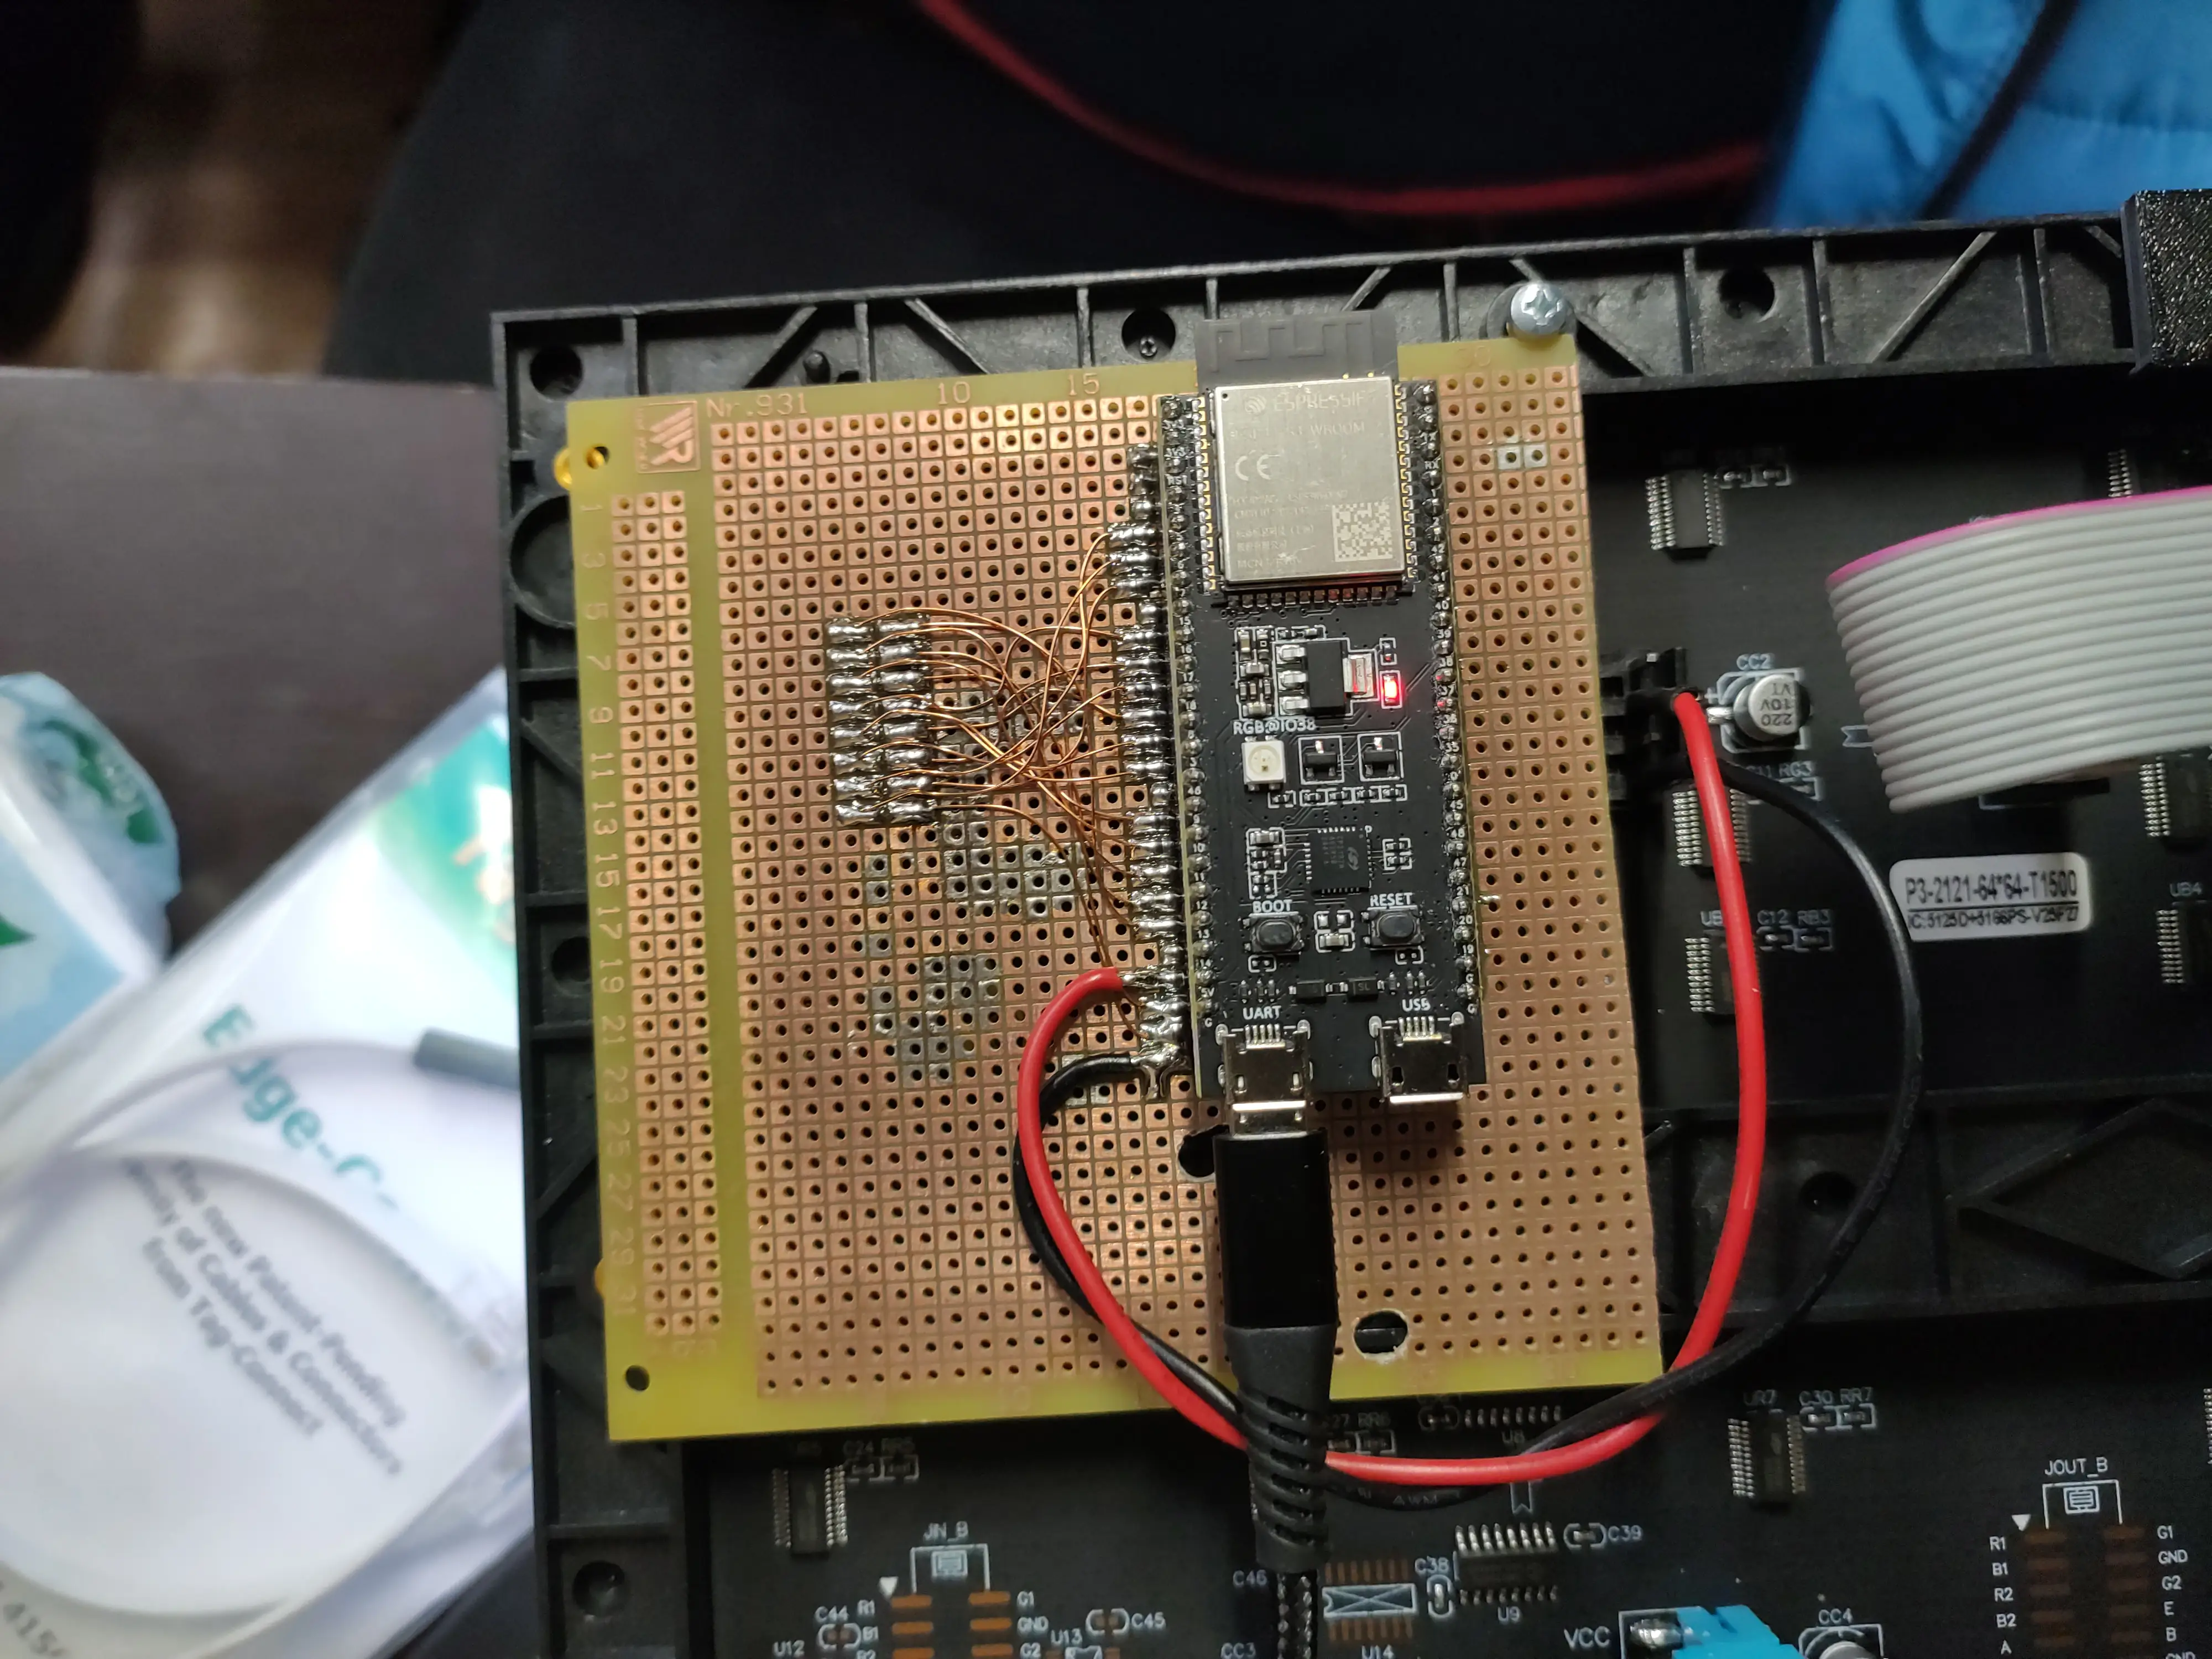
To power the panels you will need a +5V supply capable of delivering ~3A per panel. (That's the maximum I observed for a 64x64 panel, all white at max brightness.) I'm using a 5V/30A PSU that I had lying around.
FW:
Initially I used the Arduino IDE with the ESP32-HUB75-MatrixPanel-DMA library, but the ESP struggled to download images from the server.
To solve this problem I moved to ESP-IDF and used the esp-hub75 library.
After this change, the FW ran properly without any issues.
The current ESP FW can be found on GitLab.
The FW drives the panel and periodically downloads a BMP image from a web server where you can draw the image pixel by pixel. After startup, the FW fetches and shows a splash image where you can display your organization's logo. Images need to be in the correct resolution and in RGB888 format; other color formats are not supported.
Configuring FW:
I tested this FW with ESP-IDF versions 5.5.4 and 6.0.0; other versions >=5.0.0 should work as well. To use this FW with your panel, you need to adjust the URLs for both images, WiFi credentials, refresh interval, and LED panel pins. If you use a panel with a different scan pattern, the unused address pins must be set to -1 and scan_wiring must be adjusted.
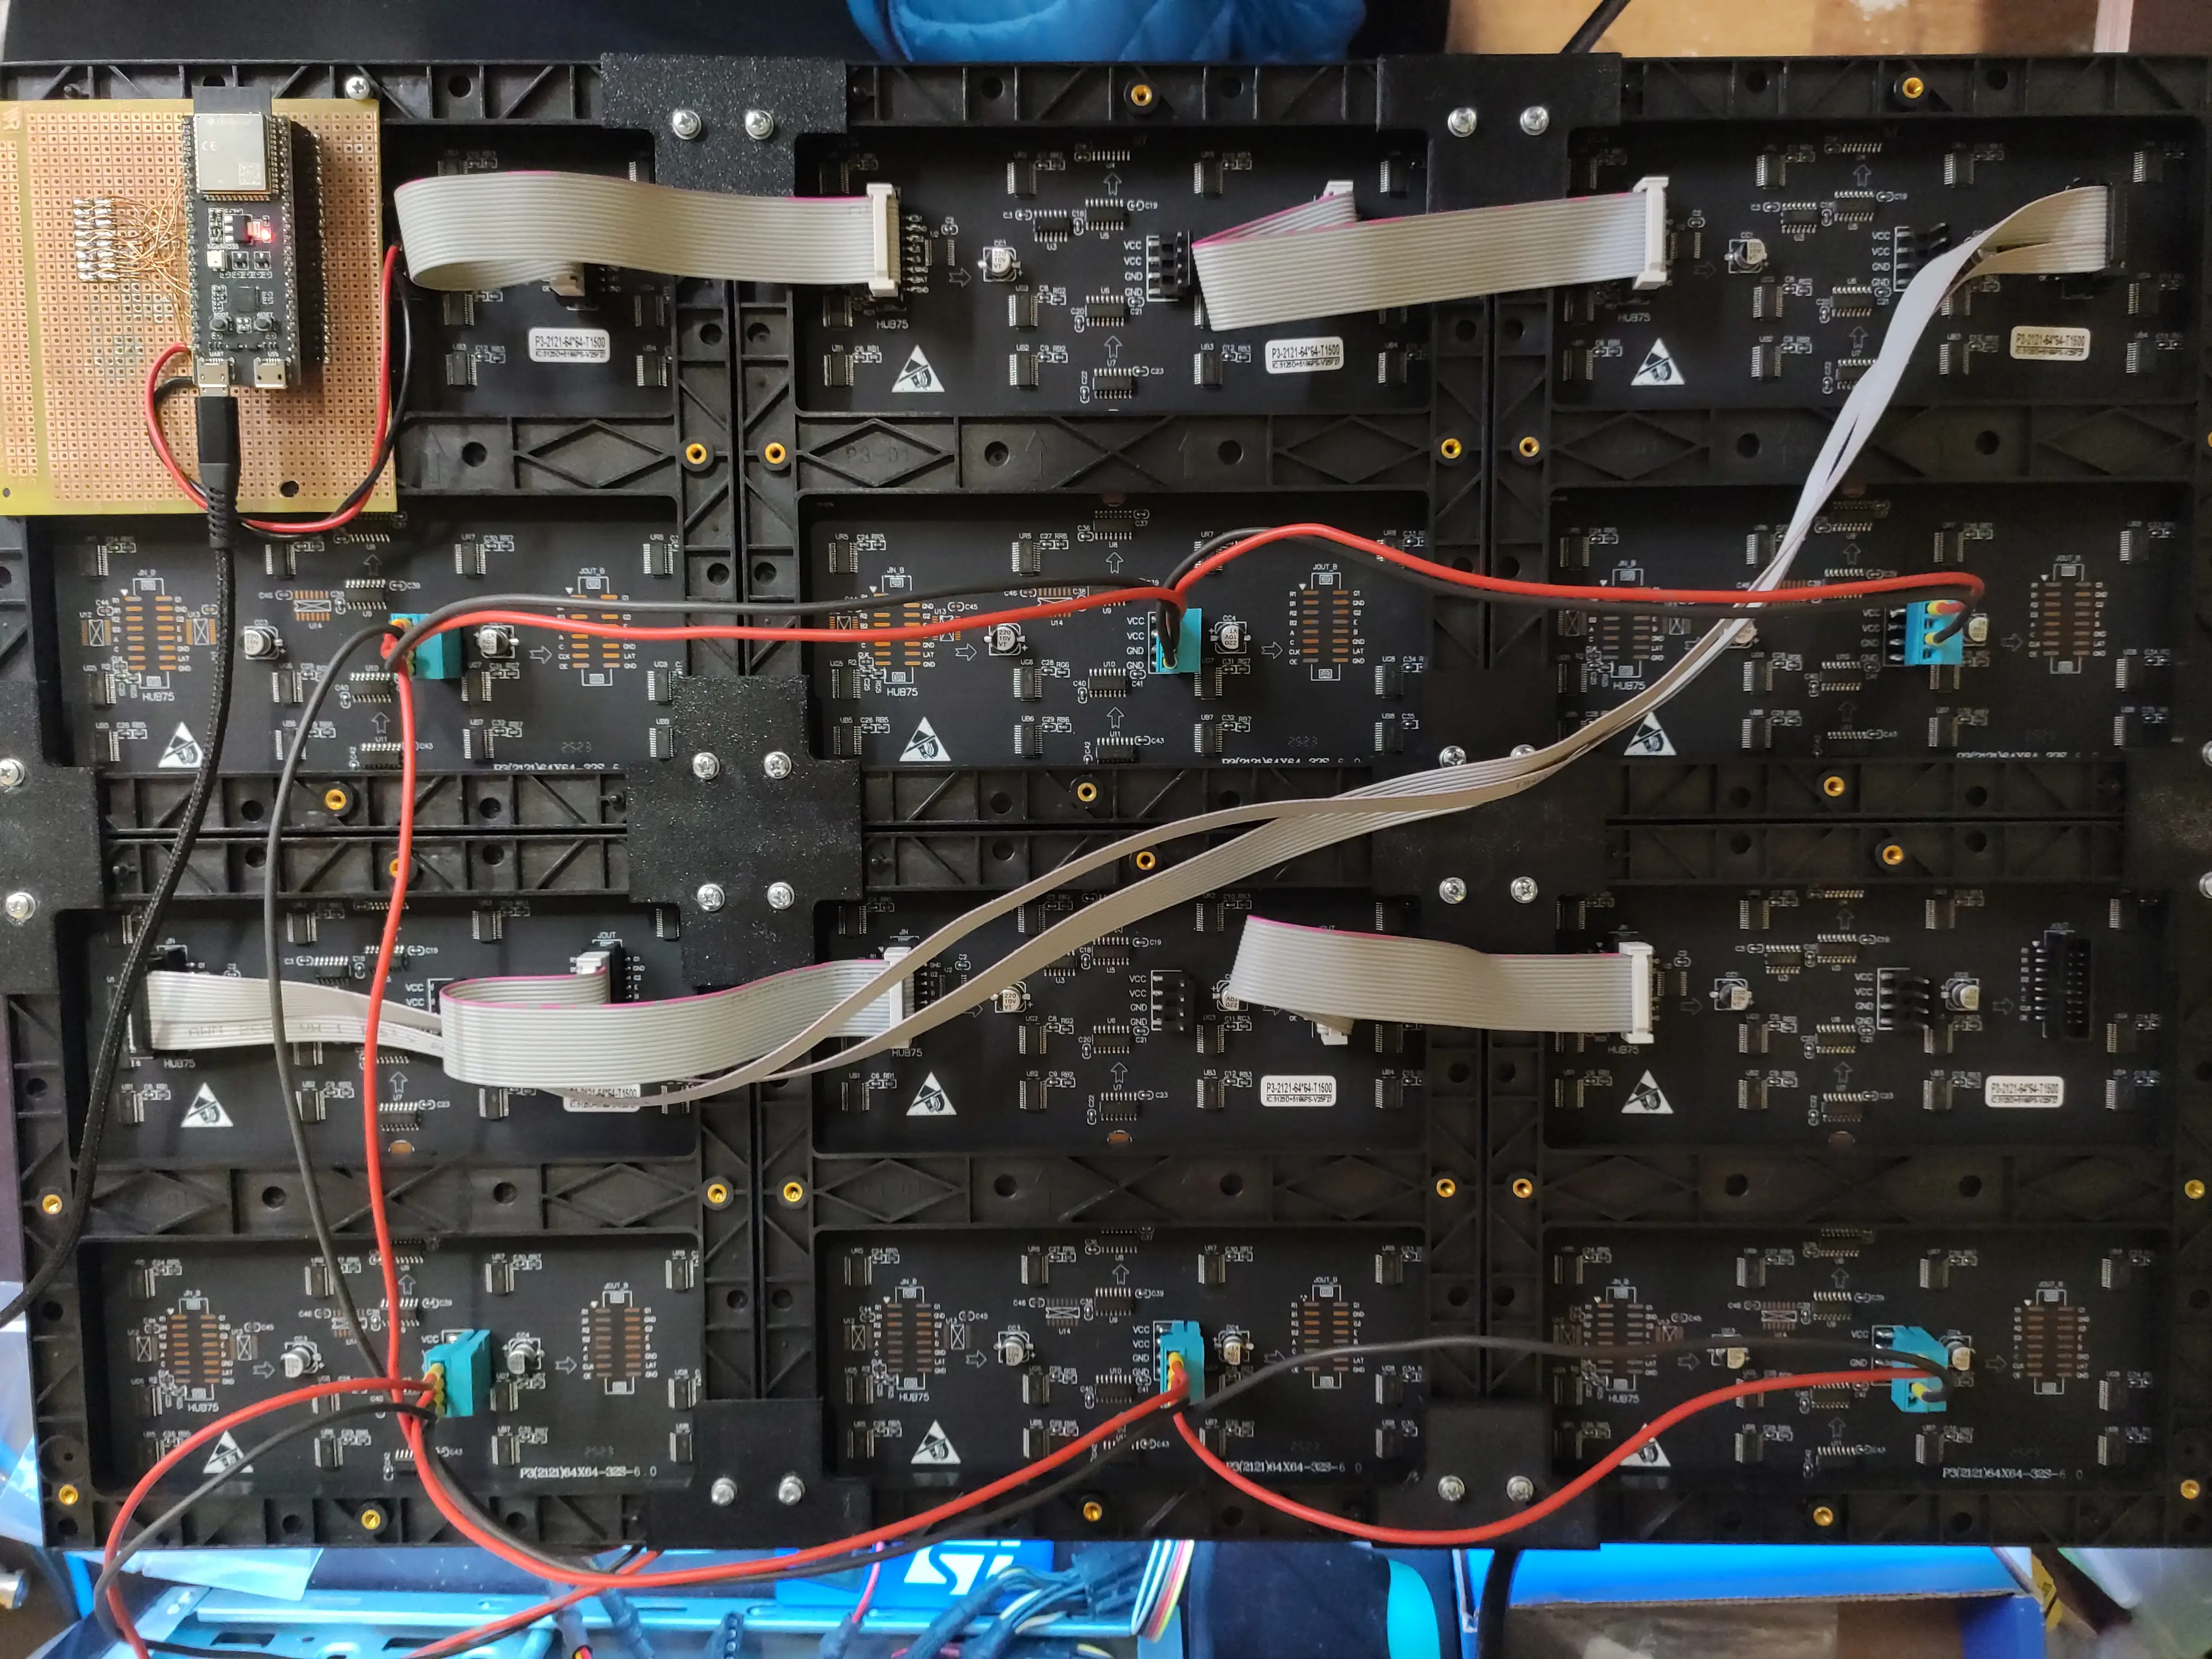
For multiple panels connected to form a bigger screen, the correct layout must be set.
When building a multi-panel display, it's better to keep the interconnect wires short. When I tried to use a faster pixel clock, I noticed that the lower 3 panels showed some glitches because I used a zig-zag configuration with a long cable going from the top row to the bottom one. This can be easily avoided.
For some reason, double buffering isn't working, but that's not an issue since the whole frame buffer is replaced on update.
Write-up by Skajp
Web service and backend
I used Python's Flask because it doesn't need to be sophisticated — it's just a website where people draw pixels, most likely on phones. For communication between the frontend and backend I used WebSockets for simplicity and ease of scripting.
Here is a link to the repo: taktplace-web
Frontend
It's a standard HTML+CSS+JavaScript frontend, nothing special. You can see how many users are online and your current pixel's X and Y coordinates. At the bottom you have your color selection and cooldown timer. For color selection I'm using the built-in color picker.
Some quirks I have found:
- On Firefox-like browsers on phones, the color selection is limited to only a few colors
- On Chromium-based browsers on phones, you can't reach the edge of the canvas
- Sometimes the WebSocket connection breaks and the site needs to be refreshed
Backend
The backend uses Flask as its core and flask_sock for WebSockets. You can define how big your display is and configure other settings like a secret phrase for bypassing the cooldown. You can get either .png or .bmp images — we use .bmp for the ESP and .png for generating time-lapses afterwards (if you want to see time-lapses from some events, scroll up). The canvas is stored as a 2D array of X and Y coordinates with colors attached. It's dockerized, so setup is easy.