Wiki Editing Guide
Welcome to the Wiki Editing Guide! This guide provides a high-level overview of how to effectively edit and manage pages in our Wiki system.
Navigating a Wiki Page
When you open a wiki page, you'll notice three main options:

- View: This is the default mode where you can read the content.
- Edit: In this mode, you can make live changes to the page, with a live preview of the markdown you're editing.
- History: Here, you can view the various stages of edits that have been made to the page. You can also delete the page in this tab.
Editing a Wiki Page
Content
The wiki pages are written in markdown. That is a language that allows you to format your text in various ways. Please check our markdown editing guide.
❗️Markdown guide
Images
To insert an image:
- Position the cursor where you'd like the image to be placed.
- Drag and drop the desired image into the editor.
Page Path & Linking
Choosing a reasonable path for each page is crucial:
If a page path ends with a "/", all relative links will be interpreted as a child of the page.
Example: For a page path "parent/", a link
[child](child)will point to "parent/child".If a page path does not end with "/", all relative links are at the same level as the page.
Example: For a page path "parent", a link
[child](child)will point to "child".
A general rule of thumb: Pages that will have subpages should end with "/" (like "projects/"). Pages that will not have any subpages shouldnt end with "/" (like "markdown-guide")
Linking to Headings
You can create a link to any heading on the page using the "#" symbol.
Example: To link to a heading titled "title", you'd use [title](#title).
Tips and tricks
You can include HTML tags to further style and change page or text properties that are not possible with MarkDown.
Here are a few tags that some project pages are using with examples:
To create a text box popup that will show while hovering above the text use:
<abbr title="Crow Revolution!!">text box popup</abbr>To change the size of a section of text use:
<font size="2">size of a section</font>Status bars for a project are created like this:
Progress only:
Progress with text:
Note that they are actually linked images created by progress-bar.dev
Therefore you can set fixed or proportional size. ( =80x, =25%x* )Fixed 80px width:
Proportional 25% of screen width:
Subproject arrows are a little tricky as there is gap from left side of the page. Ugly solution for that is:
Wiki usage How to use wiki
↳[Wiki something] Or nothing
 [Wiki usage](https://wiki.taktpraha.cz/wiki-info) <font size="1"> How to use wiki</font>
↳[Wiki something] <font size="1">Or nothing</font>
We use the non-breaking space entity to create a gap, ensuring that the text remains on a single line without breaking into multiple lines.
A better solution is welcome
Access Management
Setting Access Rights

While editing a page:
- Read Rights: Define who can view the page. Users with a user level equal to or higher than the specified Read rights will be able to see the content.
- Write Rights: Set permissions for editing and deleting the page. Users will need a user level equal to or higher than the set Write rights to make changes.
- Comment: brief description of your changes
Checking Access
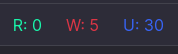
Always ensure the correct access levels are set to maintain the integrity and confidentiality of the information. Check user levels before granting specific Read or Write rights. You can see yours and page access levels at the top right corner.
Best Practices
- Organize Links Thoughtfully: Given the behavior of links based on page paths, always double-check your links to ensure they point to the right location.
- Limit Write Access: Only give Write rights to trusted users. This prevents unwanted edits or deletions.
- Use Descriptive Headings: This not only makes your page easier to read but also easier to link to specific sections.
Remember, this Wiki system uses markdown for formatting. For a deep dive into markdown syntax, refer to our dedicated markdown guide. Happy editing!